Do you want to learn how to indent second line on Google Docs?
If you’re writing a research paper or a bibliography, it’s important to format your citations correctly.
One of the formatting requirements is a hanging indent, where the first line of a citation is flush with the left margin and the second line is indented.
In this article, we’ll show you how to create a hanging indent in Google Docs.
There are several ways to indent the second line in Google Docs.
One way is to use the ruler tool, which allows you to drag the margin markers to adjust the indentation.
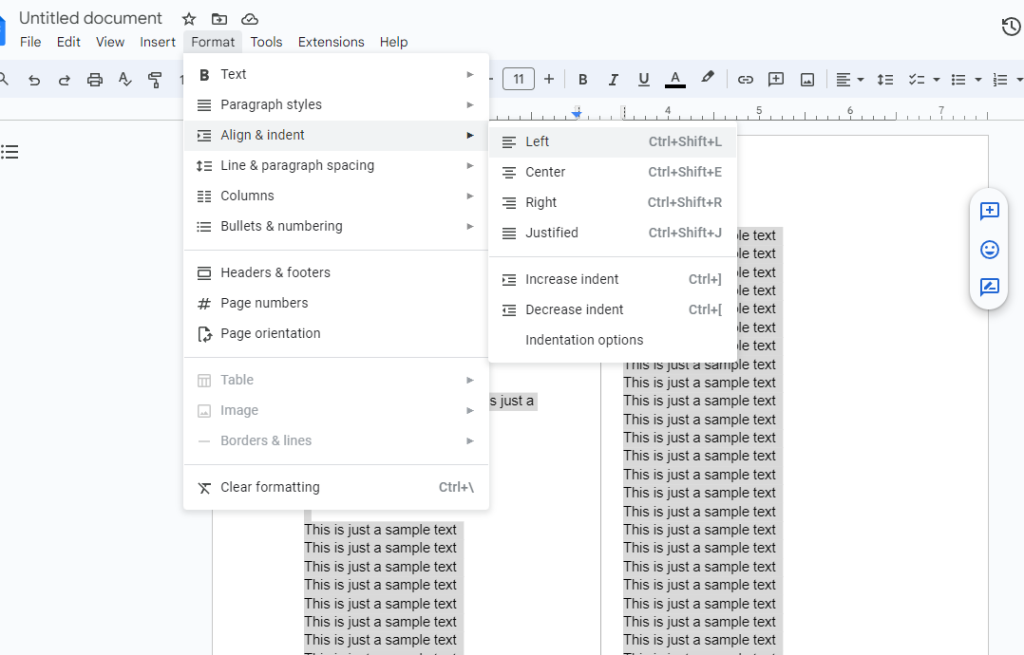
Another way is to use the Format menu and select the “Align & indent” option.
You can also use keyboard shortcuts to create a hanging indent.
We’ll cover all of these methods in this article, so you can choose the one that works best for you.
Creating a hanging indent in Google Docs is easy once you know how to do it.
With just a few clicks, you can format your citations correctly and make your document look professional.
Whether you’re a student or a professional writer, learning how to indent the second line in Google Docs is a valuable skill that will save you time and frustration.
So, let’s get started!
How To Indent Second Line On Google Docs
If you’re working on a document in Google Docs and need to indent the second line of a paragraph, you might be wondering how to do so.

Fortunately, there are a few different methods you can use to achieve this.
Accessing Google Docs
Before we dive into the different methods for indenting the second line in Google Docs, let’s first make sure you know how to access the platform.
You can access Google Docs by navigating to the Google Drive website and signing in with your Google account.
From there, you can create a new document or open an existing one.
Starting with Indentation
One way to indent the second line in Google Docs is by using the ruler tool.
To do so, simply highlight the text you want to indent, then drag the blue triangle on the ruler to the right until you reach the desired indentation.
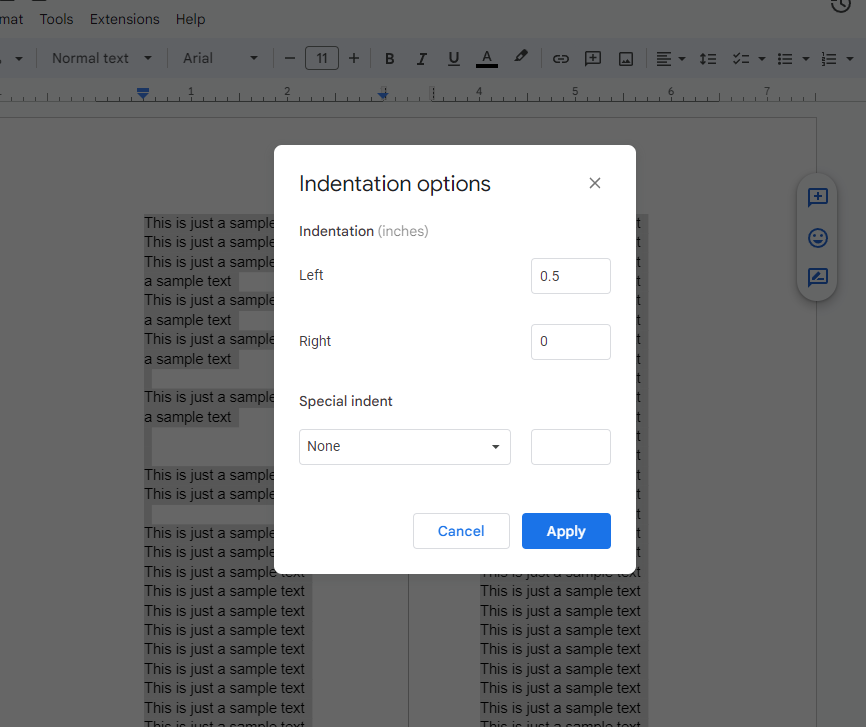
You can also use the “Indentation Options” menu to set a specific value for the indentation.
The Hanging Indent Method
Another method for indenting the second line in Google Docs is by using the hanging indent method.
This method is commonly used for citations, references, and bibliographies.
To use this method, first select the text you want to indent, then go to the “Format” menu and select “Align & Indent” followed by “Indentation Options.”
From there, select “Hanging” under “Special Indent” and set the amount of indentation you want to use.
Using the Tab Key
Finally, you can also use the tab key to indent the second line in Google Docs.
Simply place your cursor at the beginning of the second line and press the tab key.
This will create a small indentation for that line.
Overall, there are several different methods you can use to indent the second line in Google Docs.
Whether you prefer to use the ruler tool, the hanging indent method, or the tab key, these methods will help you create a professional-looking document with ease.
Formatting Indents
When working with Google Docs, formatting indents is an important aspect of creating a professional-looking document.

Here are a few tips on how to format indents in Google Docs.
Adjusting Indent Spacing
To adjust the spacing of your indents in Google Docs, you can use the ruler tool at the top of the page.
Simply highlight the text you want to indent and drag the slider on the ruler to the right.
This will increase the size of the indent.
If you want to adjust the indent spacing more precisely, you can use the “Indentation” settings in the “Format” menu.
Here, you can adjust the left and right indent spacing, as well as the spacing between the first line and the rest of the paragraph.
Applying To Multiple Paragraphs
If you want to apply the same formatting to multiple paragraphs in your document, you can use the “Format Painter” tool.
Simply highlight the paragraph with the formatting you want to copy, click on the “Format Painter” button in the toolbar, and then click on the paragraphs you want to apply the formatting to.
Another option is to use the “Styles” menu to apply formatting to multiple paragraphs at once.
Simply select the text you want to format, click on the “Styles” button in the toolbar, and choose the formatting you want to apply.
By following these tips, you can easily format indents in your Google Docs document and create a professional-looking document.
Troubleshooting Common Issues
Indenting the second line in Google Docs is a straightforward process, but sometimes you may encounter some issues.
Here are some common problems and how to troubleshoot them:
Issue 1: Indentation Is Not Consistent Throughout The Document
If you find that the indentation is not consistent throughout your document, you can use the “Format Painter” tool to copy and paste the formatting of one paragraph to another.
Here’s how you can do it:
- Select the paragraph with the correct indentation.
- Click on the “Format Painter” tool in the toolbar.
- Click on the paragraph where you want to apply the formatting.
The formatting of the selected paragraph will be copied to the new paragraph, including the indentation.
Issue 2: Indentation Is Too Large Or Too Small
If the indentation is too large or too small, you can adjust it using the “Ruler” tool.
Here’s how you can do it:
- Click on the “View” menu and select “Show ruler” if it is not already visible.
- Select the paragraph you want to adjust the indentation for.
- Click and drag the left indent marker on the ruler to adjust the indentation.
You can also adjust the indentation using the “Indentation” options in the “Paragraph styles” menu.
Issue 3: Indentation Is Not Applied To The Second Line
If the indentation is not applied to the second line, you may have accidentally deleted the tab stop.
Here’s how you can add it back:
- Click on the “View” menu and select “Show ruler” if it is not already visible.
- Select the paragraph you want to adjust the indentation for.
- Click on the “Left indent” marker on the ruler.
- Click on the “Add tab stop” button on the ruler.
- Set the tab stop position to the desired distance from the left margin.
- Click “OK” to apply the tab stop.
By following these troubleshooting tips, you should be able to fix any issues you encounter when indenting the second line in Google Docs.

Key Takeaways
Indenting the second line in Google Docs is a simple and useful formatting technique that can make your documents look more professional and organized.
Here are some key takeaways to keep in mind when indenting the second line in Google Docs:
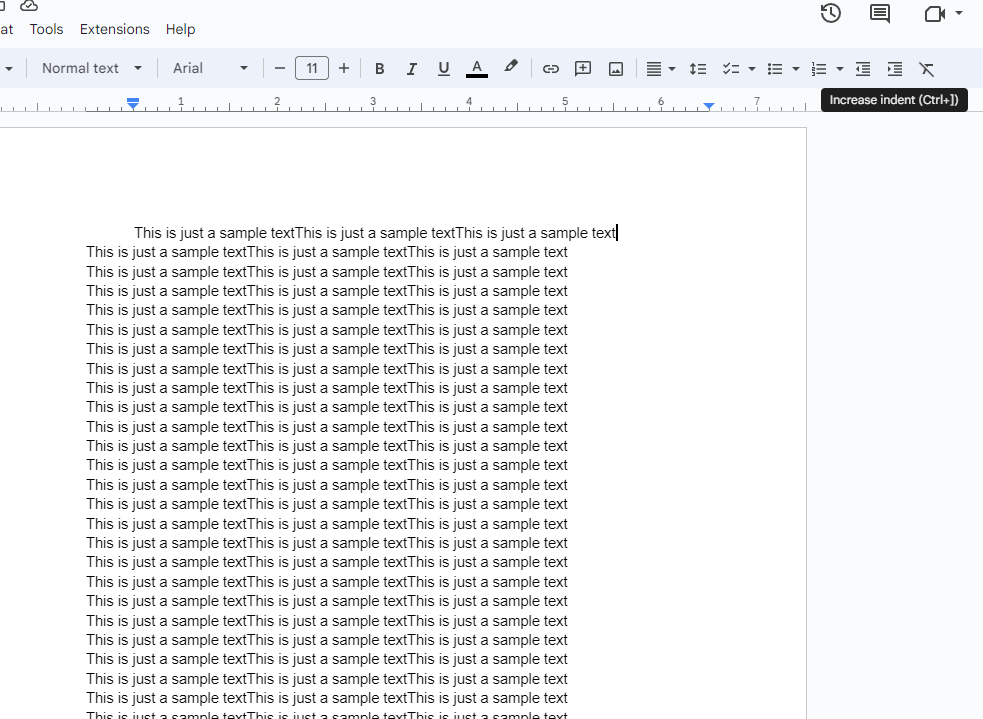
- There are several ways to indent the second line in Google Docs, including using the ruler tool, the increase indent icon, or the indentation options menu.
- You can choose to indent the entire paragraph or just a specific section of text.
- The amount of indentation you choose will depend on your personal preference and the formatting requirements of your document.
- It’s important to be consistent with your indentation throughout your document to maintain a professional and polished look.
- You can use hanging indentation, which indents all lines except the first line of a paragraph, or first-line indentation, which only indents the first line of a paragraph.
- You can also use keyboard shortcuts to quickly indent text in Google Docs.
By following these key takeaways, you can easily and effectively indent the second line in your Google Docs documents.
Whether you’re writing a research paper, a business proposal, or a personal letter, proper indentation can make a big difference in the overall appearance and readability of your document.
So next time you’re working on a document in Google Docs, remember to take advantage of the various indentation options available to you.

